Hawk Rock/Cuckoo Buttress
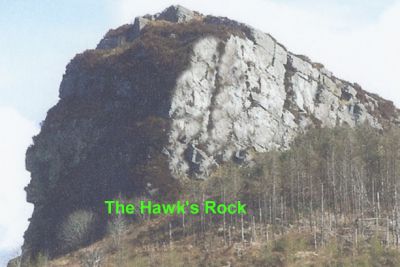
Carrignasheeoge a.k.a. The Hawk's Rock. G.R. 624268 Sheet 25 1:50,000 Discovery Series.
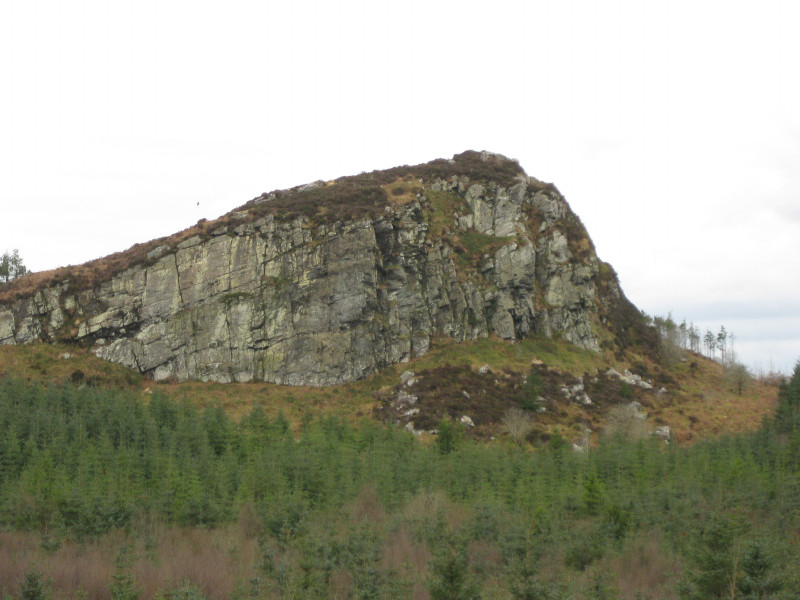
Hawk Rock as seen from the road.
Introduction
Previously, a combination of dense young trees and heavy undergrowth made access to this outcrop very tortuous. Recently, however, an excellent path has been cut through the trees to give access to the top of the rock. This, combined with an upgrading of the forest road leading to the start of the path, means that the crag can be reached via a short walk of little more than twenty minutes from the car. So, given the excellent roads between Dublin and Sligo, day trips from the capital to the crag are entirely feasible.
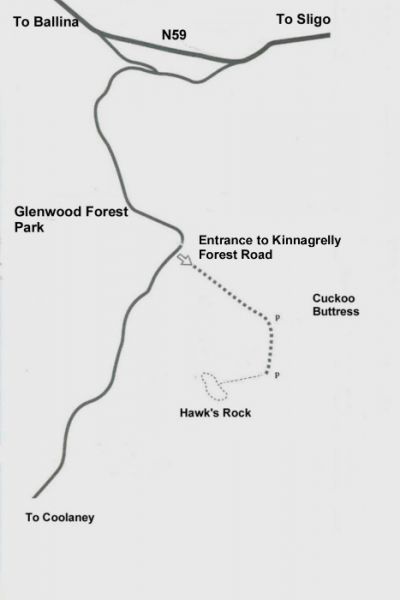
Access. Is gained via the Kinnagrelly Forest Road which starts at a bend (G.R. 621274) on the minor road running north from Coolaney to join the N59 at a point halfway between Ballysadare and Beltra. The forest road is shown on Sheet 25 and starts opposite the P sign on the map. Park to one side of the Coillte barrier, which is normally locked. Follow the forest road to where it ends, after almost a kilometer, at a small clearing beside the sign for The Hawk's Rock.
Take the path up through the trees to the top of this impressive outcrop, from which there are wonderful views of the Ox mountains, Sligo Bay, Knocknarea, Truskmore and the distant Donegal hills.
The rock is gneiss, an ideal climbing medium, giving excellent friction, even when wet. Holds are often small and flat, so good footwork is the order of the day. Most routes follow cracks, so protection can be arranged, but it needs to be worked at and small friends are very useful for the horizontal slots. There are excellent nut and hex anchor points all along the top of the crag.
From the top of the crag scramble down over rock and heather to the left (facing out) and move back right to reach the foot of the face. The climbs vary from 8m to 24m in length, with the longer routes being on the Left Wing. The climbs are described from left to right, starting with the Left Wing.
N.B. As most of these climbs were put up in the months from November to March, when the rock was often cold, and sometimes damp, (on one morning the thermometer in Joe's car showed temperatures hovering between minus one and plus two degrees as we travelled west) gradings should be taken as provisional - things may feel easier during balmy, drier days.
The Left Wing
1. Coolgliding. VS 4c.
J.R., W.J.W., G.M. 9/4/11.
This climb takes the narrow crack 1m in from the left edge of the face. An easy start leads to a problematical crux. High in the grade.
Start behind the hawthorn tree, directly below the crack. Up easily over blocks to the base of the short vee-groove in the small overhang. Arrange protection and climb the vee-groove, crux, continuing up the crack with interest.
2. Plucked. VS 4b/c.
J.R. G.M. 29/1/11.
The wide crack just right of 1. Start directly below the crack. Climb easily to the base of the crack. Enter the crack, crux, and follow it pleasantly to the top.
3. Hawkeye. VS 4c.
G.M., M.C. 13/11/10.
This route takes the thin crack in the upper face, just over 1m right of Plucked. Start directly below the crack and just left of a patch of heather at 2m. Climb some small jammed blocks to reach a ledge below the overhang. Follow the crack to the top, with excellent protection.
4. Wind beneath my wings. VS 4b.
G.M. M.C., 22/1/11.
This route takes the twin cracks in the upper face, 3m right of Hawkeye. Start directly below the cracks and just right of a patch of heather at 2m. Climb to a ledge below the cracks. Follow these to the top. Well protected.
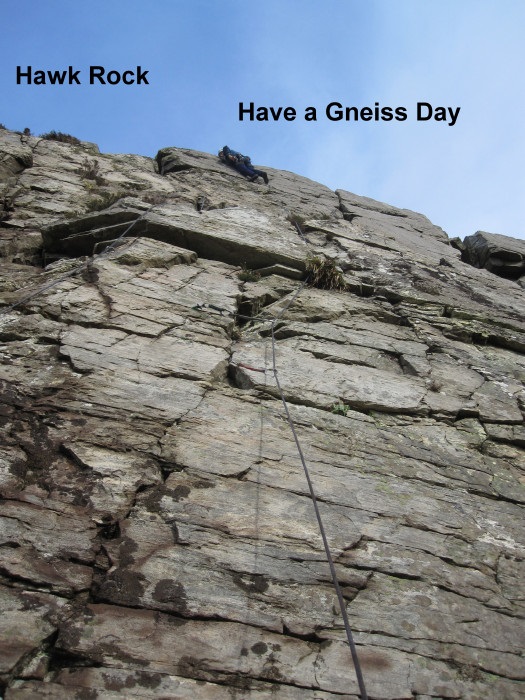
5. Have a Gneiss Day. VS 4c/5a.
G.M. M.C. 19/2/11
A thin, poorly protected start, leads to better holds and gear. While escapable at several points, it nontheless gives interesting moves throughout its length. High in the grade.
Start just right of Wind Beneath my Wings, at the foot of the thin crack slanting up diagonally right. Follow the crack, on small holds, to below the blocky overhang. Pull over this on flat holds and move up diagonally right, crossing the line of The Early Birds, to finish pleasantly up the short headwall between that route and Hawkwind.
6. The Early Birds. VS 4c.
G.M., M.C. 22/1/11.
Start 3m right of Wind Beneath My Wings, at the foot of the continuous crack running up to a wide notch in the skyline. Climb the crack, which is awkward to start, with holds and gear improving with height.
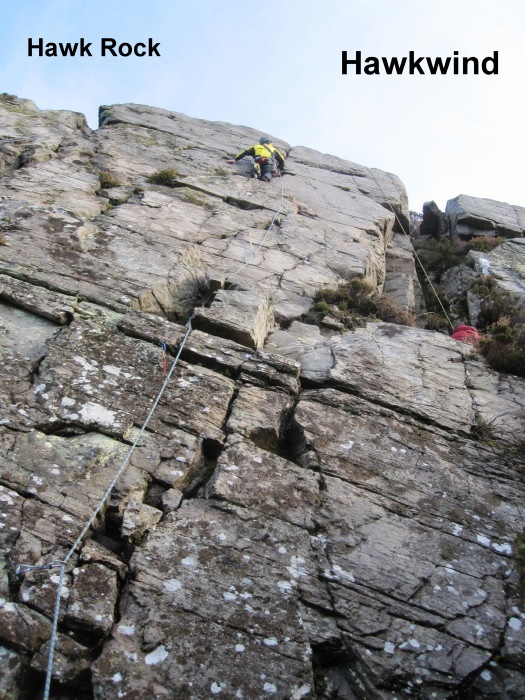
7. Hawkwind. VS 4c.
J.R., G.M. 13/11/10.
The first route recorded on the crag gives another well protected line, with the crux right at the top. Start 2m right of The Early Birds. Climb the crackline running up to the narrow notch in the skyline.
7a. The Birwalk. V. Diff.
G.M. M.C. 28/4/12.
A right to left girdle of The Left Wing. Start below the left edge of The Right Wing and right of the gully. Scramble across left and step out onto the obvious ramp. Follow this left to where it fades, make a steep move up (crux) to gain a higher ramp and follow this to its end. Step down and move left to exit at the extreme left of the crag.
The Gully
8. Featherduster. HS 4c.
G.M. M.C. 29/1/11.
Start by scrambling up to the foot of the overhanging corner at the bottom left of the gully. Climb the corner, crux, to a good ledge and continue up to finish between the wall on the left and the flake on the right.
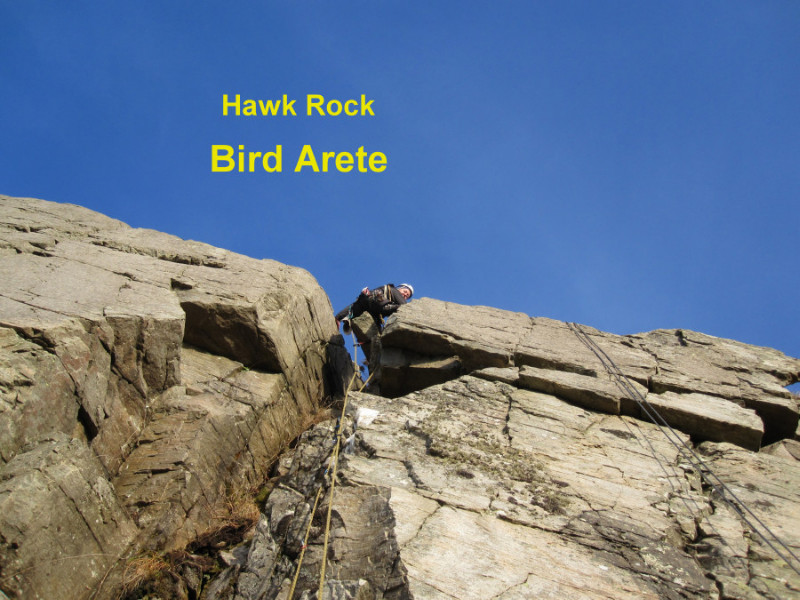
9. Bird Arete. M. Severe.
M.C. J.R. 20/11/10.
Start at the righthand side of the gully. Climb on good holds to a finish between the flake at the top and the wall on the right.
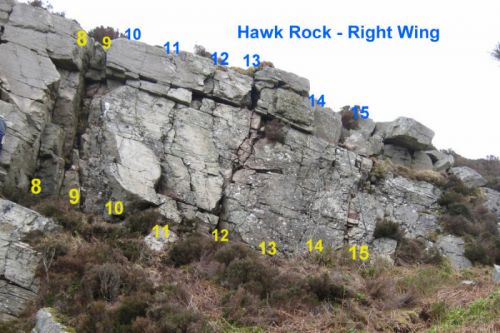
The Right Wing
This face, though short, is deceptively steep and, on some of the routes, the placing of protection requires a little skill. The bottom of the face is, unfortunately, prone to seepage.
10. Stress Test. VS 4c.
G.M., W.J.W., J.R. 9/4/11
Start below the left edge of the face. Climb direct to the jammed block, surmount this and continue to an airy finish. High in the grade.
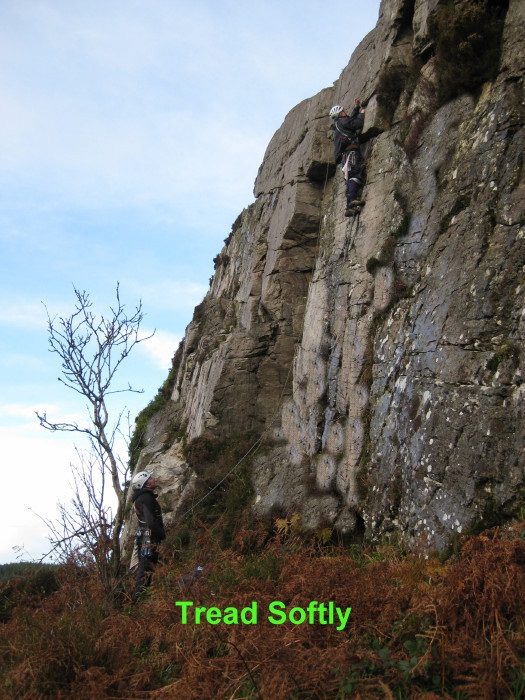
11. Tread Softly. HVS 5a.
G.M. J.R. M.C.13/11/10.
Start at the lowest point, at the foot of a tongue of rock 2m right of the gully. Climb the thin crack, which starts above a niche and continues up through the small overhang, to a delicate finish. Low in the grade.
12. Old Hawk Down. VS 4b.
J. R., G.M. 26/2/11.
Start almost 2m right of Tread Softly and climb the left branch of the Y-crack, finishing up the shallow right-facing corner.
13. Big Bird. HS.
M.C., W.J.W., G.M. 19/3/11
Start just over 1m right of Old Hawk Down. Climb on flat holds, moving diagonally left to gain the right branch of the Y-crack. Follow this through a break to the top.
13a. Sparrowhawk. HS.
E. O'Neill, J. Reville 28/4/12
Start mid-way between Big Bird and Raptor. Climb on small holds to a ledge (this first section unprotected). Move up through the break in the overhang on better holds and with good protection.
14. Raptor. S.
J. R., M.C. 20/11/10.
Start 2m right of Big Bird, just right of the small rowan tree. Climb the crack to gain the ledge below a short right-facing corner. Move up and left from the ledge.
15. Little Chick. V. Diff.
M.C., G. M. 29/1/11.
The short crack just right of Raptor.
The N/E Face of Hawk Rock, Inishmurray Wall.
Cuckoo Buttress
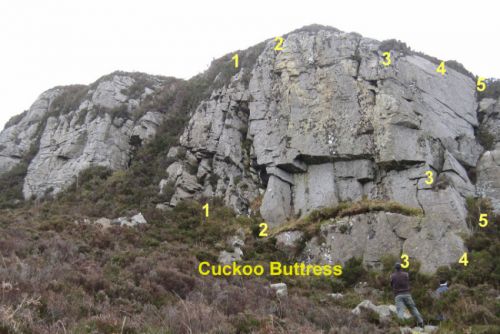
This is the buttress seen up on the left as you approach the parking spot for Hawk Rock. It is reached in less than ten minutes from a parking spot at a bend on the track, directly below the buttress. It has a steep, undercut, central section, flanked on either side by easier-angled rock. We paid one visit here, and put up a number of routes on the steep face. Several easier routes were also done by Joe and myself on the flanks, but given the complete absence of protection, lack of obvious lines to follow and scarcity of belays on top, we decided they would be of little interest.
Climbs on the central area are described from left to right and protection is adequate on all of these routes. There is scope for more lines here.
N.B. The first three route names are provisional.
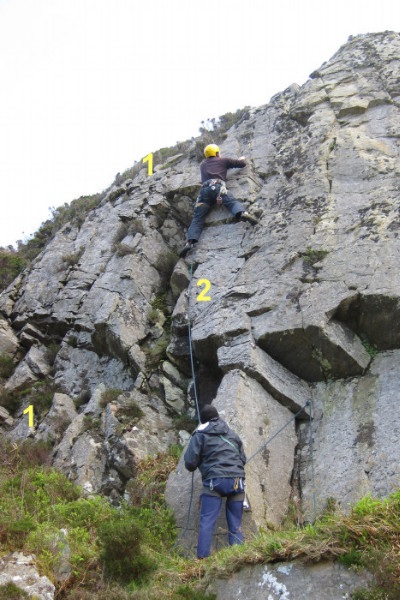
1. Just William HS. 4a
W.J.W., G.M. 23/4/2011.
Start 3m right of the heather filled gully at the lefthand end of the central section, and just left of a tall niche, below a crack running up the height of the face. Climb the crack.
2. Where there's a Will. HS 4b
W.J.W., G.M. 23/4/2011.
Start just right of the niche and below the left end of a long grassy ledge. Tackle the long overhang at its left end (crux) and continue up the face on good holds.
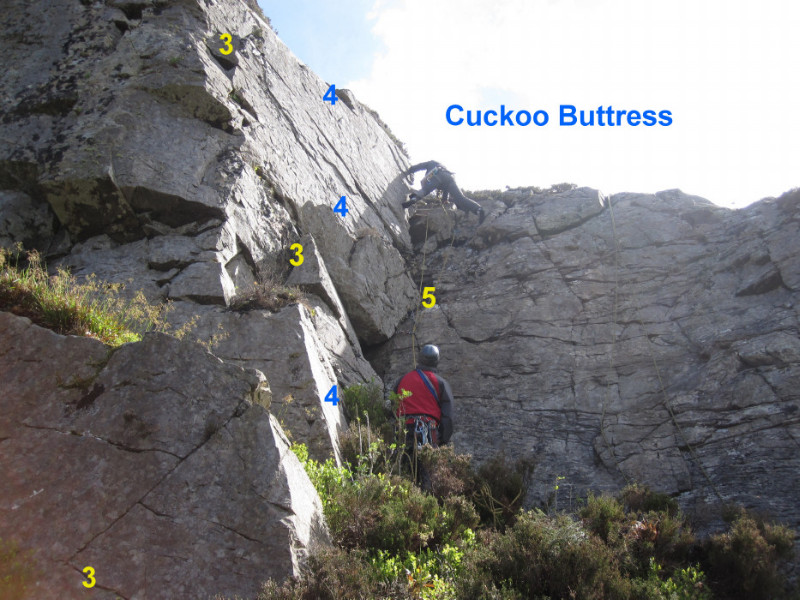
3. Sweet William. Severe.
W.J. W., G.M. 23/4/2011.
Start at the lowest section of rock, below the right end of the long grassy ledge. Climb up trending slightly right to gain the short crack above the right end of the ledge. Up right again to the top of the narrow block. Step across left and climb the arete on good holds.
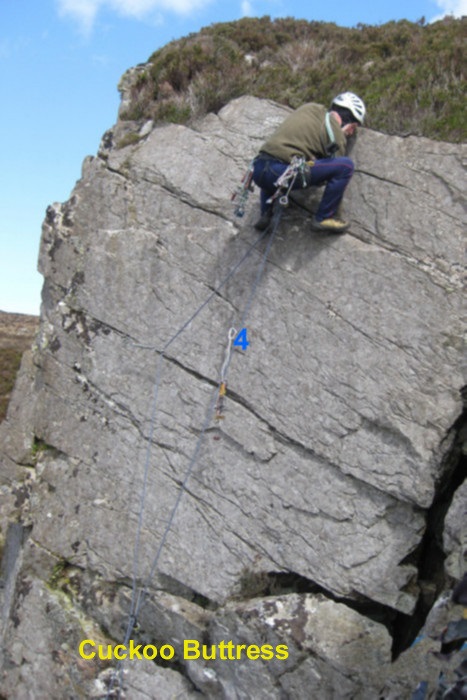
4. A Wandering Voice. HS 4b.
G.M., W.J.W., J.R. 23/4/2011.
Start 2m right of Sweet William, below the the short right-facing headwall. Climb directly to a ledge below the wall. Steep moves lead up the wall.
5. Cuckoo Corner. V. Diff.
M.C., J.R. 23/4/2011.
Start below the corner just right of A Wandering Voice. Climb the corner.
Climbers: Margaret Casey, Joe Reville, Willie J. Whelan, Gerry Moss.
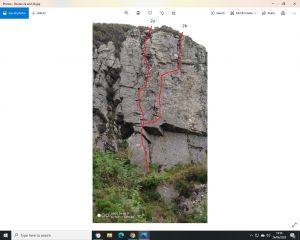
The two routes marked as 2a and 2b were climbed by us in 2006. They were unrecorded and the grades and descriptions were lost. The routes were cleaned again in 2020 and climbed and graded. Descriptions below.
2a. Rain Dance VS 4c 11m
Martin Daly Brendan Proctor 2006 (re-cleaned, climbed 23/6/2020)
Start: towards the L.H.S. of the overhang there is a rib that stands on the grass ledge.
Climb the rib to the base of a crack. Climb the crack direct to the top.
Good nut, friend and flake belays have been uncovered 6 metres back from crag.
2b Jigsaw E1 5b 11m
Martin Daly Brendan Proctor 2006 (re-cleaned, climbed 25/6/2020)
Start as for Rain Dance.
At the top of the rib step right into the base of crack. The crack has three vertical slots that are used for protection and to make upward progress. At top slot, move right and up on small edges (crux) to gain crack leading to top.
Inishmurray Wall
The North East side of Hawk Rock has an overhanging wall that is up to 30 metres in height (Inishmurray Wall). The wall overhangs from top to bottom by about 2 metres. There are a number of crack lines in the wall. The descent path to the base of the wall is on the right hand side as you look out from the top of the crag. The descent path is accessed by turning right immediately after exiting from the forest. Follow the track down staying next to the wall until the base is reached (less than 1 minute). There is a final obvious 'step down' at the end of the descent track. The first route starts from this 'step down'.
First Blood 20 metres E3 6a (1 rest)
Martin Daly Brendan Proctor 25th May 2019
Route starts from the bottom of the descent track at the L.H.S. of the wall. From the top of the final step on the descent route, move right into obvious jam crack and climb up to the large ledge above. At the back of this ledge there is an overhang. From the top of the overhang, a crack runs out slightly rightwards, to the top of crag. Arrange gear in horizontal cracks below the large overhang. Pull up strenously into the overhang and place a good number 3 rock above in crack. Continue pulling up and surmount the overhang by hard moves to gain the base of the overhanging crack. Climb strenously up the crack to below the groove. (1 rest taken here). Move up and pull into the groove using a few poor jams. Climb up the groove and gain a jug on the wall on the left. Exit using a small 'spring board' at the top. Stake belays.
Rubicon 25metres E3 6a (1 rest)
Martin Daly Brendan Proctor 19th June 2020
Route starts 5 metres right of First Blood below a groove. The route follows the groove and the overhanging wide crack above.
Climb up onto a large pedestal on the right at 2 metres. Step left onto the wall and gain the groove above with difficulty. Follow the groove passing another difficult section to the large ledge at mid-height. Good rest. Move slightly left to the base of the wide overhanging crack. Climb strenuously up the crack to where it widens to an off-width. Climb the off-width (crux) by using small edges on the left wall. Where these small edges run out, an aid point was used here to gain the large hand hold on the right at the top of the off-width. One arm rest possible at this point.. Good jams and jugs to the top from here.
